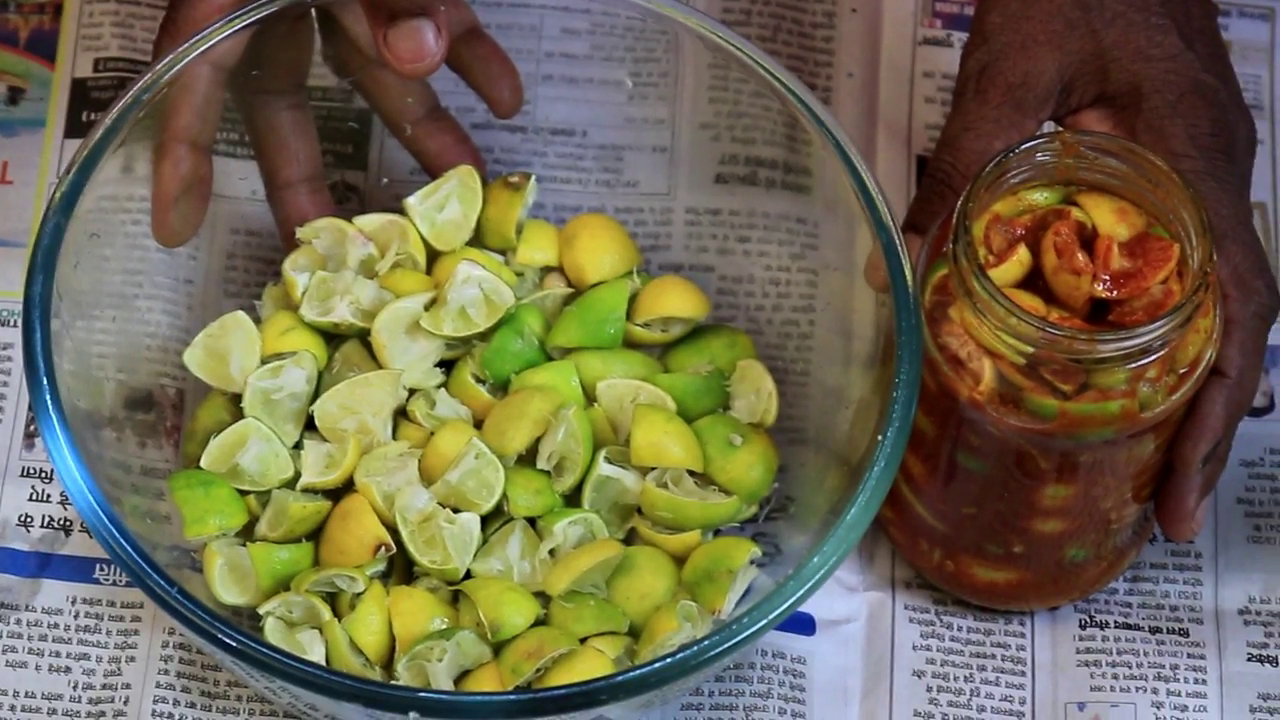
Today we are going to make two types of pickle of lemon peel (Nimbu ke chilke ka achar).
Ingredients for the pickle of lemon peel (Nimbu ke chilke ka achar) of the first type:
Lemon peel
A small bowl (half cup) lemon juice
One spoon cashmere red chilly
Two tablespoon salt
Half teaspoon turmeric powder
The first method of pickle of the lemon peel (Nimbu ke chilke ka achar):
1- Cut 8 pieces in a lemon peel.
2- Add a small bowl (half cup) lemon juice, one spoon cashmere red chilli, two teaspoons of salt and half a teaspoon turmeric powder and mix them well.
3 – Now the pickle is ready. Put it in a jar. Keep the pickle everyday in the sunlight for the next seven days. Now this pickle is ready to eat.
Ingredients for the another pickle of lemon peel (Nimbu ke chilke ka achar):
Lemon peel
2 teaspoons lemon juice
5 teaspoons of sugar
One spoon plain salt
One teaspoon black salt
One spoon cashmere red chilly
Half teaspoon turmeric powder
Materials needed for tadka:
Two tablespoon oil
A spoonful of mustard seeds
Half teaspoon fennel
Half teaspoon carom seeds
A pinch of asafoetida
Method of another pickle of lemon peel (Nimbu ke chilke ka achar):
1- Heat two glasses of water in a patila and put a filter on it. Keep the lemon peel in this filter and cover it and cook for 10 minutes on medium flame.
2- Now cool the boiled lemon peel and add 2 teaspoon lemon juice, 5 spoonful of sugar, one spoonful of plain salt, a spoonful of black salt, a spoonful Kashmiri red chilli and half teaspoon turmeric powder in it. Mix all the things well.
3- Now add tadka in it.
4- In a pan, heat two teaspoons of oil. Then add a spoonful of mustard seeds, half teaspoon fennel, half teaspoon carom seeds and a pinch of asafetida in the oil and cook it for half a minute. In this way, Tadka will be ready.
5- Mix this tadka well in pickle. Now the pickle is ready.
For long lasting pickle, necessary points to keep in mind:
1- The utensils in which the pickle is kept, should be dried.
2- Never take pickle with wet hands or wet spoon.
3- Keep the upper part of the jaar of the pickle clean.
Beverages Breakfast Main Course Snacks Starter Sweets
आज हम नीबू के छिलके का दो तरह का अचार (Nimbu ke chilke ka achar) बनाने वाले हैं ।
पहले तरह का नीबू के छिलके का अचार (Nimbu ke chilke ka achar) के लिए आवश्यक सामग्री:
नीबू का छिलका
एक छोटी कटोरी (आधा कप) नीबू का रस
एक चम्मच कश्मीरी लाल मिर्च
दो चम्मच नमक
आधा चम्मच हल्दी पाउडर
पहले तरह का नीबू के छिलके का अचार (Nimbu ke chilke ka achar) की विधि :
१- एक नीबू में ८ टुकड़े काट लेंगे ।
२- एक छोटी कटोरी (आधा कप) नीबू का रस, एक चम्मच कश्मीरी लाल मिर्च, दो चम्मच नमक और आधा चम्मच हल्दी पाउडर डालकर सबको अच्छे से मिला देंगे ।
३ – अब अचार तैयार है । इसको एक जार में दाल देंगे । अगले सात दिन तक इस अचार के जार को रोज रोज धूप में रखेंगे । अब यह अचार खाने के लिए तैयार है ।
दूसरे तरह का नीबू के छिलके का अचार (Nimbu ke chilke ka achar) के लिए आवश्यक सामग्री:
नीबू का छिलका
२ चम्मच नीबू का रस
५ चम्मच चीनी
एक चम्मच सादा नमक
एक चम्मच काला नमक
एक चम्मच कश्मीरी लाल मिर्च
आधा चम्मच हल्दी पाउडर
तड़के के लिए आवश्यक सामग्री:
दो चम्मच तेल
एक चम्मच सरसो का दाना
आधा चम्मच सौंफ
आधा चम्मच अजवाइन
एक चुटकी हींग
दूसरे तरह का नीबू के छिलके का अचार (Nimbu ke chilke ka achar) की विधि :
१- एक पतीला में दो गिलास पानी गरम करके उसके ऊपर एक छन्ना रख देंगे । इस छन्ने में नीबू के छिलके को रख कर ढक देंगे और १० मिनट के लिए मध्यम आंच पे पका लेंगे ।
२- अब इस उबले हुए नीबू के छिलके को ठंडा करके उसमें २ चम्मच नीबू का रस, ५ चम्मच चीनी, 1 चम्मच सादा नमक, 1 चम्मच काला नमक, एक चम्मच कश्मीरी लाल मिर्च और आधा चम्मच हल्दी पाउडर डालकर सबको अच्छे से मिला लेंगे ।
३- इस अचार में अब तड़का लगा लेंगे ।
४- तड़का के लिए एक तड़का पैन में दो चम्मच तेल गरम कर लेंगे । फिर तेल में एक चम्मच सरसो का दाना, आधा चम्मच सौंफ, आधा चम्मच अजवाइन और एक चुटकी हींग डालकर सबको आधे मिनट के लिए पका लेंगे । इस तरह तड़का तैयार हो जायेगा ।
५- इस तड़के को अचार में अच्छे से मिला लेंगे । अब अचार तैयार हो गया है ।
अचार लम्बे समय तक चले, इसके लिए जरुरी नुस्खा:
१- जिस बर्तन में अचार रखे वो बर्तन सूखा होना चाहिए ।
२- अचार को गीले हाथ या गीले चम्मच से कभी न निकालें ।
३- अचार के जार के ऊपरी हिस्से को साफ़ रखें ।
Please follow https://www.facebook.com/7starkitchen


